
Table of Contents
Want to take your chicken recipes to the next level? Brining chicken is a simple yet transformative process that infuses your meat with moisture and flavor, ensuring every bite is juicy and tender. Imagine serving perfectly seasoned chicken that not only tastes fantastic but also impresses your family and friends.
In this recipe, we’ll guide you through the easy steps of creating a homemade brine solution using basic ingredients like salt, water, and optional herbs and spices. Whether you’re grilling, roasting, or preparing a delicious meal prep option, mastering the art of brine chicken will open up a world of culinary possibilities. So, let’s dive in and discover how to make brine chicken that’s bursting with flavor and guaranteed to be a hit at your dinner table!
What is Brine Chicken?
Brine chicken is a culinary technique that involves soaking chicken in a saltwater solution, often enhanced with herbs and spices, to boost its moisture and flavor. This simple process is the secret to achieving juicy, flavorful chicken every time you cook.
Why Brine Chicken?
Brining works by allowing the salt to penetrate the meat, which helps retain moisture during cooking. This is especially important for lean cuts like chicken breast, which can easily dry out. Top Reasons to Brine Chicken:
- Enhanced Flavor: The brine solution infuses the chicken with savory goodness, making every bite delicious.
- Juiciness: The process helps the chicken absorb water, resulting in tender, juicy meat.
- Versatility: You can customize your brine with various herbs, spices, and even a touch of sugar for a hint of sweetness.
The Science Behind Brining
When you brine chicken, the salt helps break down some of the proteins in the meat, which allows it to hold onto more moisture. This means that even if you overcook it slightly, your chicken will still be tender and juicy. Plus, you can experiment with different flavors by adding garlic, peppercorns, or citrus to your brine.
Getting Started
Now that you understand the magic of brine chicken, it’s time to dive into the ingredients and the brining process. Remember, the key is to use a good balance of salt and other flavorings to create a brine solution that perfectly suits your taste.
Brining chicken is not just a technique; it’s an enjoyable cooking experience that will elevate your meals to a whole new level. So, gather your ingredients, and let’s get to work on making the perfect brine chicken!
Ingredients
When it comes to brining chicken, the beauty lies in its simplicity. You don’t need an extensive list of ingredients to create a flavorful brine. Here’s what you’ll need to get started:
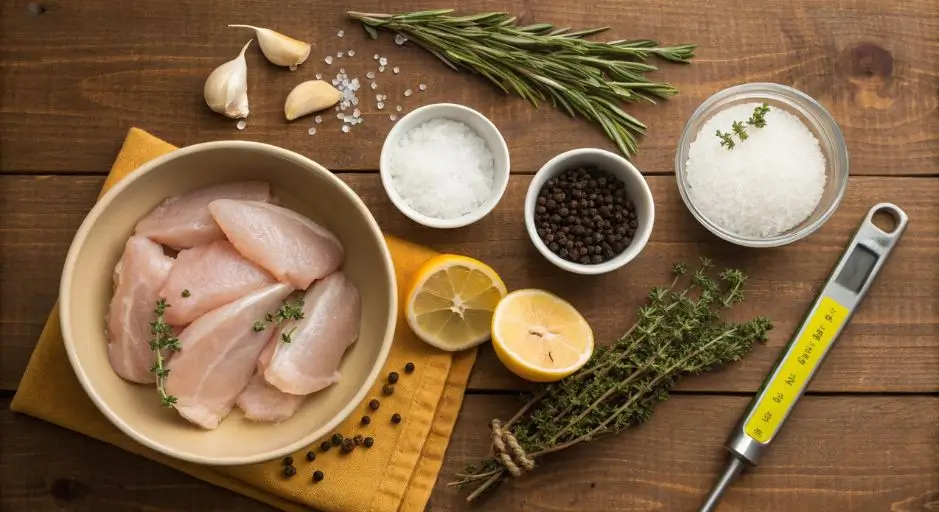
Basic Brine Ingredients:
- Water: 4 cups (this will be the base of your brine)
- Salt: ½ cup (kosher salt is recommended for its texture and flavor)
- Sugar: ¼ cup (optional, but it helps balance the saltiness and adds a hint of sweetness)
- Herbs and Spices: Choose a few from the following options for added flavor:
- Fresh or dried thyme
- Bay leaves
- Black peppercorns
- Garlic cloves (smashed)
- Lemon slices or zest
- Chicken: 2 to 4 pounds of your choice (breasts, thighs, or whole chicken)
Optional Flavor Enhancers:
- Soy Sauce: ¼ cup for a savory twist
- Apple Cider Vinegar: 2 tablespoons for a tangy flavor
Feel free to mix and match these ingredients to create a brine that suits your taste preferences. The key is to maintain the right ratio of salt to water for effective brining.
How to Make the Brine
Creating your brine is a straightforward process that can be done in just a few simple steps. Let’s walk through it together!
Step-by-Step Guide to Making Brine:
- Combine the Ingredients:
- In a large mixing bowl or pot, combine the water, salt, and sugar. Mix until the salt and sugar have completely dissolved.
- Add Flavorings:
- Toss in your chosen herbs, spices, and optional flavor enhancers. This is where you can get creative! For example, adding garlic and thyme will give your brine a lovely aromatic quality.
- Cool the Brine:
- Allow the brine to cool to room temperature. If you’re in a hurry, you can add ice cubes to speed up the cooling process. This step is crucial, as adding warm brine to chicken could start cooking the meat.
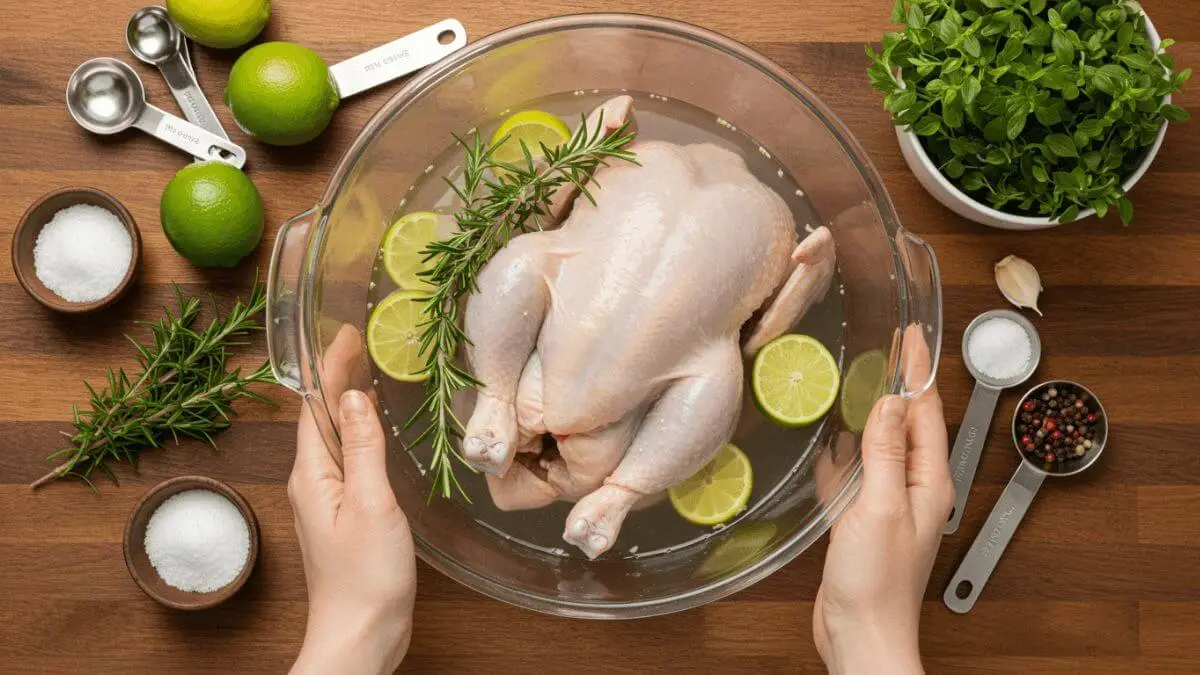
- Brine the Chicken:
- Place your chicken in a large, resealable plastic bag or a non-reactive container. Carefully pour the chilled brine over the chicken, making sure it is entirely covered. If you’re using a bag, seal it securely, expelling as much air as possible. If using a container, cover it with a lid.
- Refrigerate:
- Let the chicken brine in the refrigerator for at least 1 hour, but ideally 4 to 12 hours for maximum flavor absorption. For smaller cuts like breasts, 1 to 2 hours is sufficient.
By following these simple steps, you’ll have a delicious brine chicken ready to be cooked to perfection. Remember, brining is a flexible process, so feel free to experiment with different spices and flavors to make the recipe your own!
The Directions
Now that your chicken has soaked up all that delicious brine, it’s time to cook it to perfection! Whether you prefer grilling, roasting, or pan-searing, these steps will guide you through the cooking process and ensure your brine chicken turns out flavorful and juicy.
Cooking Methods for Brine Chicken:
Grilling:
- Preheat the Grill: Heat your grill to medium-high.
- Remove and Rinse: Take the chicken out of the brine and rinse it under cold water to remove excess salt. Pat it dry with paper towels.
- Season: Optionally, add a light sprinkle of your favorite seasoning or rub to enhance the flavor.
- Grill: Place the chicken on the grill. Cook for about 6-8 minutes per side, depending on the thickness, or until the internal temperature reaches 165°F (75°C).
Roasting:
- Preheat your oven to 400°F (200°C).
- Prepare the Chicken: Remove the chicken from the brine, rinse it, and pat it dry. If you’re using a whole chicken, tuck the wings under and season the outside.
- Roast: Place the chicken in a roasting pan and cook for 1 to 1.5 hours, or until the internal temperature reaches 165°F (75°C). Baste occasionally for added moisture.
Pan-Seering
- Heat the Pan: Add a tablespoon of oil to a skillet and heat it over medium-high heat.
- Prepare the Chicken: Rinse and dry the chicken as before. Season if desired.
- Cook: Place the chicken in the skillet and sear for about 5-7 minutes on each side until golden brown and cooked through.
Tips for Perfectly Cooked Chicken:
- Always utilize a meat thermometer to ensure you check the internal temperature accurately.
- Allow the chicken to rest for 5-10 minutes after cooking so the juices can redistribute.
- Serve with your favorite sides, such as roasted vegetables or a fresh salad, to round out your meal.
Storing Tips
After you’ve enjoyed your delightful brine chicken, you might be wondering how to store any leftovers. Proper storage will keep your chicken fresh and flavorful for future meals.

Storing Leftover Brine Chicken
- Refrigeration:
- Let the chicken fully cool to room temperature before placing it in storage.
- Store the chicken in a sealed container or securely wrap it in plastic wrap.
- Leftover brine chicken can be kept in the refrigerator for up to 3-4 days.
- Freezing:
- For longer storage, you can freeze cooked brine chicken.
- Wrap it tightly in plastic wrap and then in aluminum foil or use a freezer-safe bag.
- Mark the package with the date and freeze it for up to 3 months.
- When it’s time to eat, thaw in the refrigerator overnight and reheat before serving.
Reheating Tips
- To reheat, use the oven at a low temperature (around 350°F or 175°C) to maintain moisture.
- You can also reheat in the microwave, but do so in short intervals to avoid drying it out.
With these tips, you can savor your brine chicken long after the initial meal, making it a versatile addition to your culinary repertoire! Enjoy the ease and satisfaction of having delicious, ready-to-eat chicken on hand!
Conclusion
You’ve now learned how to brine chicken, a simple technique that transforms your meals into flavorful, juicy delights. Brining not only enhances the taste but also keeps your chicken moist, making it perfect for grilling, roasting, or sautéing.
As you experiment with different herbs and spices in your brine, you’ll discover endless possibilities to suit your taste. So, gather your ingredients and start brining—your delicious chicken awaits! Enjoy every bite!
FAQs
1. How long should I brine chicken?
For best results, brine chicken for at least 1 hour; however, 4 to 12 hours is ideal for maximum flavor and tenderness.
2. Can I brine chicken overnight?
Yes! Brining overnight is perfectly fine and will yield incredibly flavorful chicken. Just be cautious not to exceed 24 hours, as it may become too salty.
3. Can I reuse brine?
It’s not recommended to reuse brine due to the bacteria that can develop after handling raw chicken. Always make a fresh batch for each use.
4. What types of salt can I use for brining?
Kosher salt is preferred for its texture and ease of use. Avoid using table salt, as it is more concentrated and can lead to overly salty chicken.
5. What can I do with leftover brine?
While it’s best not to reuse brine, you can strain it and use it as a base for soups or sauces, as long as it hasn’t been contaminated with raw meat.
Do you have questions about brine chicken? Drop them in the comments and let’s get cooking!