
Table of Contents
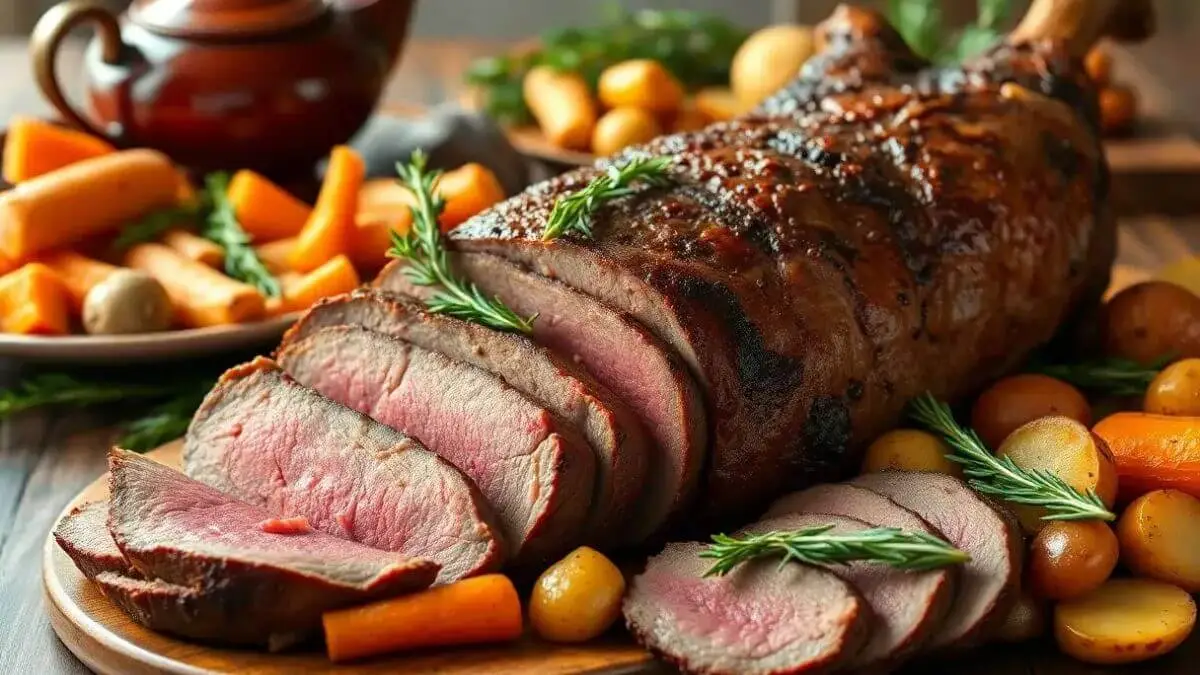
Looking to elevate your next dinner with a dish that’s both comforting and impressive? A beef arm roast recipe is the perfect way to bring rich, tender flavors to your table. Whether you’re hosting a family gathering or simply craving a hearty meal, this versatile cut shines with minimal effort. Have you ever wondered how to turn a simple roast into something extraordinary? With just a few easy upgrades, you can transform this classic dish into a showstopper. From flavorful seasoning to foolproof cooking methods, we’ll guide you every step of the way. Ready to make your beef arm roast the star of the meal? Let’s get started!
What is a Beef Arm Roast?
If you’re new to cooking with a beef arm roast, you’re in for a treat! This cut, also known as a chuck shoulder roast, comes from the upper part of the cow’s shoulder. It’s well-marbled, which means it’s packed with flavor and becomes incredibly tender when cooked low and slow. Think of it as the ultimate comfort food—perfect for Sunday dinners, family gatherings, or meal prep for the week.
Here’s why this cut stands out
- Flavor Profile: The marbling ensures a rich, beefy taste that’s hard to beat.
- Versatility: It works beautifully in the oven, slow cooker, or Instant Pot.
- Budget-Friendly: It’s often more affordable than premium cuts like ribeye or tenderloin, yet just as satisfying.
Whether you’re braising, roasting, or slow-cooking, a beef arm roast adapts to your preferred method. Plus, it pairs wonderfully with hearty sides like mashed potatoes, roasted veggies, or a simple gravy. Ready to make this underrated cut the star of your next meal? Let’s dive into the details!
Ingredients for Beef Arm Roast Recipe
Gathering the right ingredients is the first step to creating a flavorful and tender beef arm roast recipe. Here’s what you’ll need to make this dish shine:
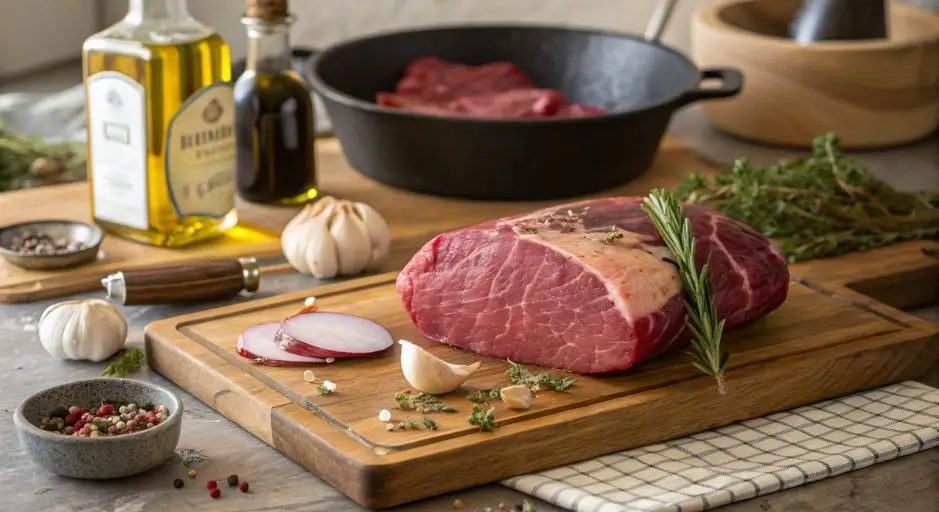
- Beef Arm Roast: A 3-4 pound roast is ideal for most families.
- Olive Oil: For searing and locking in moisture.
- Garlic: Fresh cloves add a robust, aromatic flavor.
- Onion: Sliced or chopped to enhance the savory base.
- Beef Broth: Keeps the roast moist and creates a rich gravy.
- Seasonings: Salt, black pepper, and optional herbs like thyme, rosemary, or bay leaves.
Pro Tips for Ingredient Prep
- Fresh is Best: Use fresh garlic and herbs for maximum flavor.
- Quality Matters: Opt for a well-marbled roast for better tenderness.
- Customize: Add carrots, potatoes, or mushrooms for a complete one-pot meal.
With these simple ingredients, you’re ready to create a dish that’s both delicious and approachable. Let’s move on to the cooking process!
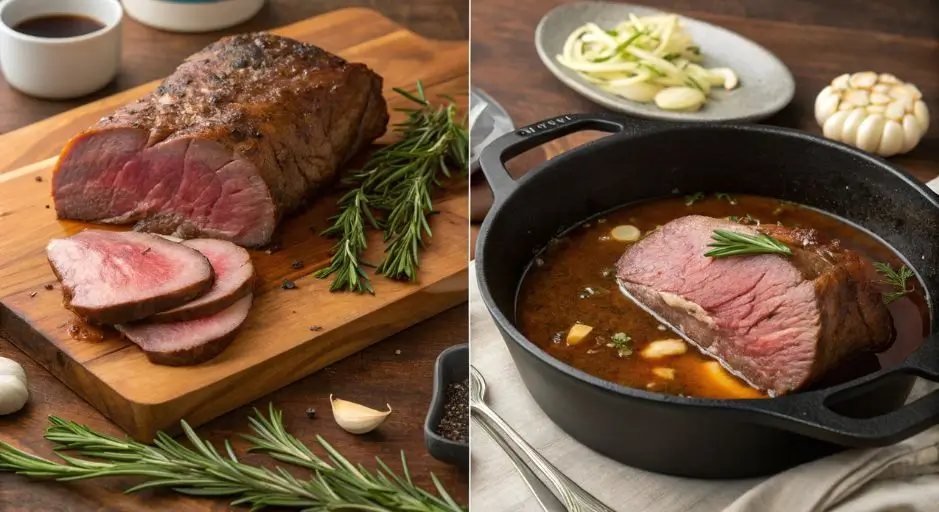
How to Make a Beef Arm Roast Recipe
Ready to turn that beef arm roast into a mouthwatering masterpiece? Follow these simple steps for a tender, flavorful result every time:
- Prep the Roast: Pat the roast dry with paper towels and season generously with salt and pepper. This helps create a delicious crust when searing.
- Sear for Flavor: Heat olive oil in a large skillet or Dutch oven over medium-high heat. Brown the roast on all sides until it’s beautifully golden (around 3-4 minutes per side). This step seals in moisture and enhances the rich, savory flavor.
- Add Aromatics: Toss in garlic and onion, letting them soften slightly for 1-2 minutes. These ingredients will infuse the roast with savory goodness.
- Deglaze the Pan: Pour in beef broth, scraping up any browned bits from the bottom of the pan. These bits are packed with flavor!
- Cook Low and Slow: Transfer everything to a roasting pan or slow cooker. Cover and cook at 325°F (163°C) in the oven for 3-4 hours, or on low in a slow cooker for 8 hours. The roast is ready when it becomes tender enough to pull apart with a fork.
Pro Tips for Success
- Rest Before Serving: Let the roast rest for 10-15 minutes to redistribute the juices.
- Check Doneness: Use a meat thermometer to ensure the internal temperature reaches 190°F (88°C) for maximum tenderness.
With these steps, you’ll have a beef arm roast that’s tender, juicy, and full of flavor. Let’s move on to the finishing touches!
The Directions
Now that your roast is cooked to perfection, it’s time to bring it all together. Here’s how to serve and enjoy your beef arm roast like a pro:
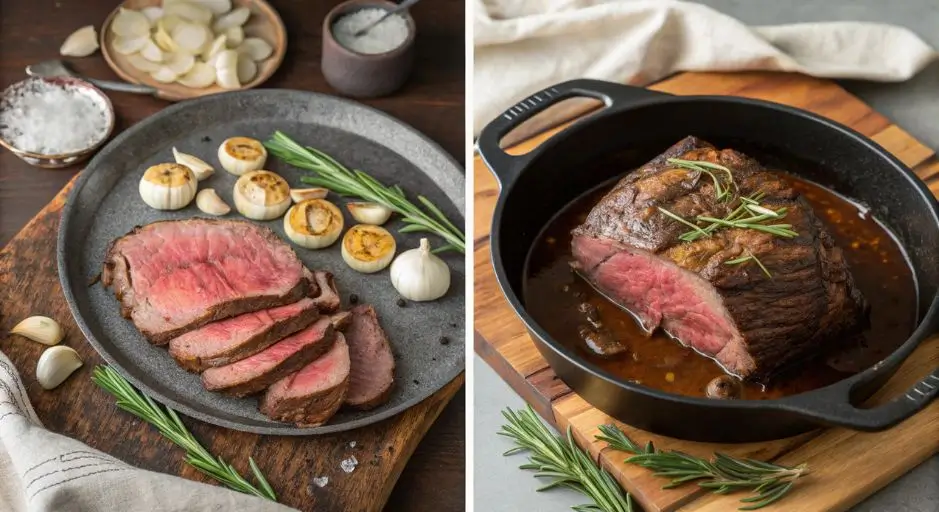
- Slice Against the Grain: Use a sharp knife to slice the roast thinly against the grain. This ensures every bite is tender and easy to chew.
- Make a Simple Gravy: Strain the cooking liquid into a saucepan, skim off excess fat, and simmer until slightly thickened. Add a cornstarch slurry (1 tablespoon cornstarch + 2 tablespoons water) for a thicker gravy if desired.
- Plate with Style: Arrange the sliced roast on a platter, drizzle with gravy, and garnish with fresh herbs like parsley or thyme for a pop of color.
- Pair with Sides: Serve alongside classic comfort foods like mashed potatoes, roasted vegetables, or a crisp green salad.
Pro Tips for Serving
- Keep It Warm: Cover the roast with foil while you prepare the sides to keep it warm.
- Save the Leftovers: Store any extra roast and gravy separately for easy reheating later.
With these final touches, your beef arm roast recipe is ready to impress. Let’s wrap up with some handy storing tips!
Storing Tips for Your Beef Arm Roast Recipe
Got leftovers? No problem! Here’s how to store your beef arm roast to keep it fresh and flavorful for days:
- Refrigerate Properly: Store the cooled roast and gravy in separate airtight containers. It will maintain its freshness in the fridge for about three to four days.
- Freeze for Later: Wrap the roast tightly in plastic wrap or aluminum foil, then place it in a freezer-safe bag or container. It remains freezer-friendly for a solid three months. Allow it to thaw in the refrigerator overnight before reheating.
- Reheat with Care: To retain moisture, reheat the roast in a covered dish with a splash of beef broth or gravy. Use the oven at 300°F (150°C) or the microwave on low power.
Pro Tips for Leftovers
- Repurpose Creatively: Use leftover roast in sandwiches, tacos, or hearty soups for a quick meal.
- Portion for Convenience: Freeze individual servings for easy grab-and-go lunches or dinners.
With these storing tips, you can enjoy your beef arm roast recipe long after the first meal. Let’s wrap up with some final thoughts!
Conclusion
There’s something truly special about a well-cooked beef arm roast recipe. It’s hearty, flavorful, and perfect for bringing people together around the table. Whether you’re cooking for a cozy family dinner or a special occasion, this dish delivers comfort and satisfaction in every bite.
Here’s why this recipe stands out:
- Effortless Elegance: With just a few simple steps, you can create a meal that feels gourmet.
- Versatility: It adapts to your preferred cooking method—oven, slow cooker, or Instant Pot.
- Leftover Potential: The roast and gravy can be repurposed into quick, delicious meals throughout the week.
So, the next time you’re looking for a dish that’s both impressive and approachable, give this beef arm roast recipe a try. A classic favorite that always delivers satisfying flavor.
Got questions? Check out the FAQs below for more tips and tricks. Happy cooking!
FAQs
Got questions about making the perfect beef arm roast recipe? We’ve got answers! Here are some common queries and expert tips to help you master this dish:
1. Is there a substitute for beef arm roast?
Yes! While beef arm roast is ideal, chuck roast or brisket are great substitutes. Just adjust cooking times based on the cut’s thickness and marbling.
2. What’s the best way to check if the roast is fully cooked?
The roast is ready when it’s fork-tender and reaches an internal temperature of 190°F (88°C). Use a meat thermometer for accuracy.
3. Can I make thCan this recipe be made using an Instant Pot?
Absolutely! Sear the roast using the sauté function, then pressure cook on high for 60-75 minutes with a natural release for tender results.
4. What’s the best way to reheat leftovers?
Reheat in the oven at 300°F (150°C) with a splash of broth or gravy to keep the meat moist. Cover with foil while reheating to retain moisture and prevent drying.
5. Can I freeze the cooked roast?
Yes! Wrap it tightly in plastic wrap or foil, then place it in a freezer-safe bag or container. Can be stored fresh for up to three months.
Do you have questions about beef arm roast recipe? Drop them in the comments and let’s get cooking!